Wednesday, 27 June 2012

23 - . Back to basics

The circuit water temperature gauge works with a stable voltage ? 10 volts according to the wiring diagram.


After checking the temperature sensor and the little clock assumptions are not more guilty than the " Gauge voltage stabilizer " , the surprise is that the parts must have been a problem since it did not work.

Given this difficulty choose to open the original regulator and see what's inside and surprise Oh ! A wonderful regulator ? mechanical tension ... defective. Operates with a bimetal and a resistance wound on the bimetal to make the circuit open and closure to achieve effective V 10V.


Curious that Industrial Engineers invent things ... . Obviously here is to put technology. Let's see what they do other engineers .Telecomunication Eng. for example.


Hands On and a visit to Radio Onda, like old times, soldering iron, tin, tester and work . Old radiopitas never die.


Let's use an electronic voltage regulator with output voltage 10 V , grace is in place within the capsule where the mechanical governor was .

TO220 Package


With this circuit we obtain 1 Amp output is more than enough to feed the little clocks .


 Clean container and all necessary materials :

LM7810 integrated circuit
Condenser inlet 330 nF , 35V
Condenser outlet 100 nF , 25V
macaroni and shrink
rivets to close the set


The wiring is simple, the input (12 V ) is located on the left integrated circuit, the center pin is the ground and the right pin is stabilized and short to 10V output . The circuit also has a thermal overload protection .


Riding on the 7810 aluminum cap allows us to use the capsule as radiator


We now have a stable 10V voltage and temperature gauge work properly . Externally it is indistinguishable from the original of 1960.


VERY IMPORTANT , MUST NOT BE MOUNTED IN THE SAME PLACE IS THE ORIGINAL , IS TOO HOT AND ELECTRONIC LOCATION AND HEAT HAS NO WEAR WELL .

Friday, 8 June 2012

22 - . Finalizing details ... but something strange appears


We have finished repairing the engine.

 Along the way there have been problems and opportunities.

"BECAUSEAS" changed all sleeves as well change the stainless steel water pipe :


... and also will have to watch the fuel level and water temperature gauge sometimes fails:


" BECAUSEAS" we have taken the gearbox has also replaced the rubber block clamp .


And of course, spark plug wires

"BECAUSEAS" premiered new battery, will we replace the battery holder drawer .


At address, brush and horn switch mechanism in the steering wheel hub , as it was broken and occasionally the TR decided to start their own concert horn . Also have changed the spring clip of the zipper and all associated hardware .


Have also been changed all gaskets and rubber bell gearbox .


It seems that everything is under control but the water temperature gauge to work properly .


Do not loose the next chapter.

Tuesday, 22 May 2012

21.- Its first 50 km.

The hole is filled


Riding the tunnel ventilation .
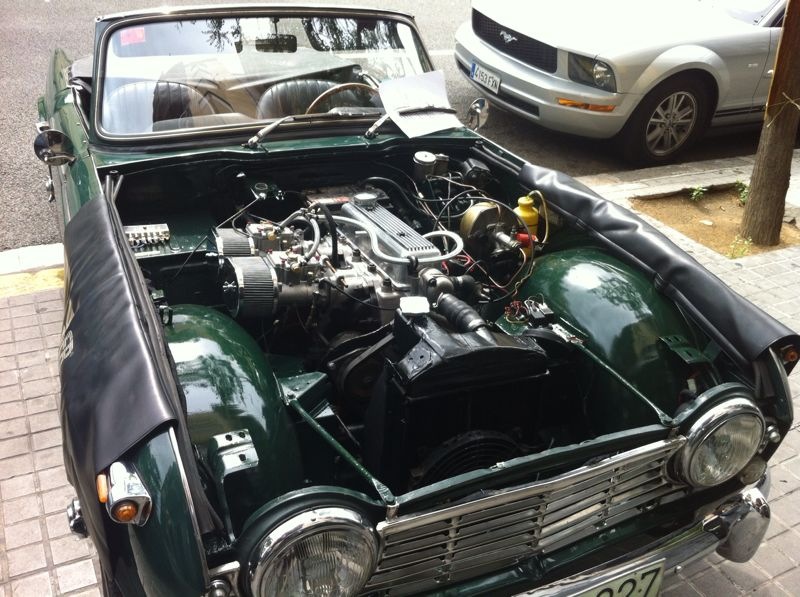
The TR4 is an early TR4 that were made , probably left the factory Standard Motor Co., in Coventry the second half of December 1960.

Take the radiator that sat on the TR3 model, although the front grille is much wider than the TR3 , allowing more air .

Installed the tunnel pipeline later models of TR4 , which allows the ability to get more air inlet to offer front grille, this has required a special operation since the radiator is narrower .


To mount the tunnel we had to machined steel plate parts that show in FIG to fasten with screws to the frame by rivets radiator and attach the parts you provided Bastuck . It also has some adjustments required bending the part .


The advantage is that we will have enough to mount a recovery bottle next to the radiator space. Originally only had a drain pipe .

Well dressed and about partying


9668 start point Km 0


There are still some details but with excellent spring sunshine aguantábamos not more so to the beach.

FIRST RIDE 50 Km


 With Gonzalo (Delta Carburació Sport) and Mario , the two mechanics at the car after doing 25 km, is the return trip to Barcelona.


The car worked brilliantly


Friday, 18 May 2012

20 -. Attaching ... and first roar.

The carburetors. Will he return everything to its place?

about to be mounted. Carburació Delta Sport has lived up to its name.


First roar youtu.be


First start up in youtu.be
Ay! Does anyone remembered to tighten the fitting of the by-pass? Nothing happens, the engine starts, does not sound bad for his first roar, the oil pressure goes up to the top of the head ... as has been shown.

It was a hit, now quiet, exhaust mount and ride the water circuit.

Thursday, 17 May 2012

19 - . THE REUNION


The day began with consideration of whether we should cut the thrust axis with circular clutch fork and take a bite, as it had been blocked by the broken screw inside. Indeed preventively and we requested replacements .


EL CUERPO DEL DELITO


The good offices of Gonzalo "Delta Carburació Sport" and an accurate trephination fork to reach the opposite end of the broken bolt inside, has solved the problem without any damage to the shaft and fork easily repairable damage.

BODY OF CRIME
Unarmed and defeated the rebel screw can rebuke the process. Now if you can mount the thrust bearing press .


The repair of the fork , required to fill the hole with weld and reinforce the fork. With the strengthening of the weld has been better than new .


... and then build a new steel screw lock , even reproduced the system also safe with a steel wire to prevent unwanted movement .


.... AND NOW THE REUNION , chassis and engine are again.


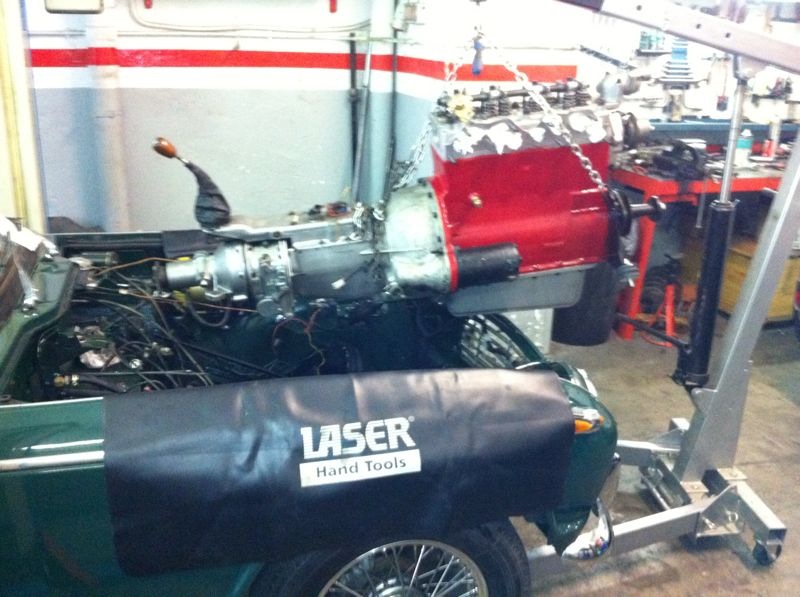
Since qua was necessary to remove the gearbox to solve the problem of " crazy screw " assembly is mounted outside the engine mount assembly and gearbox. You can also observe the starter ( black ) .

The photo is spectacular. The length of the whole fan from the nose to the right to the left overdrive makes driving all the air is not easy.

Vision frontal


front Vision
The engine already installed inside the enclosure - motor.


El motor ya instalado en el interior del recinto-motor.


Vision finned aluminum crankcase, to the right hand brake is appreciated.

Wednesday, 16 May 2012

18 - . Awake girl that we go out


 Finally it's time to move the body .


LET GO ... to wake up !


After a long sleep, we will take the body to the workshop Gonzalo to mount the motor.


The RAC again moved the car , this time to the final encounter with the motor.


Special mention to the crane drivers RAC . The car has been out twice and entered the parking once throughout the repair , it's like put it down the drain of a sink, without brakes or motor. They did it without changing the color of the columns at the expense of the body of Triumph , again thanks RAC! .


Both the engine and chassis have changed dramatically since the beginning of the adventure :


But the day we still had prepared a nasty surprise ...

When we tried to get the thrust bearing embraque Press , has proved impossible, the locking screw of the yoke was broken on the inside and has forced us to remove the gearbox to try to find a solution.


Can the solution go through having to replace the fork shaft and clutch fork ... cutting it with a circular ?

It was a major setback ... continue.